This is an Atomic Pi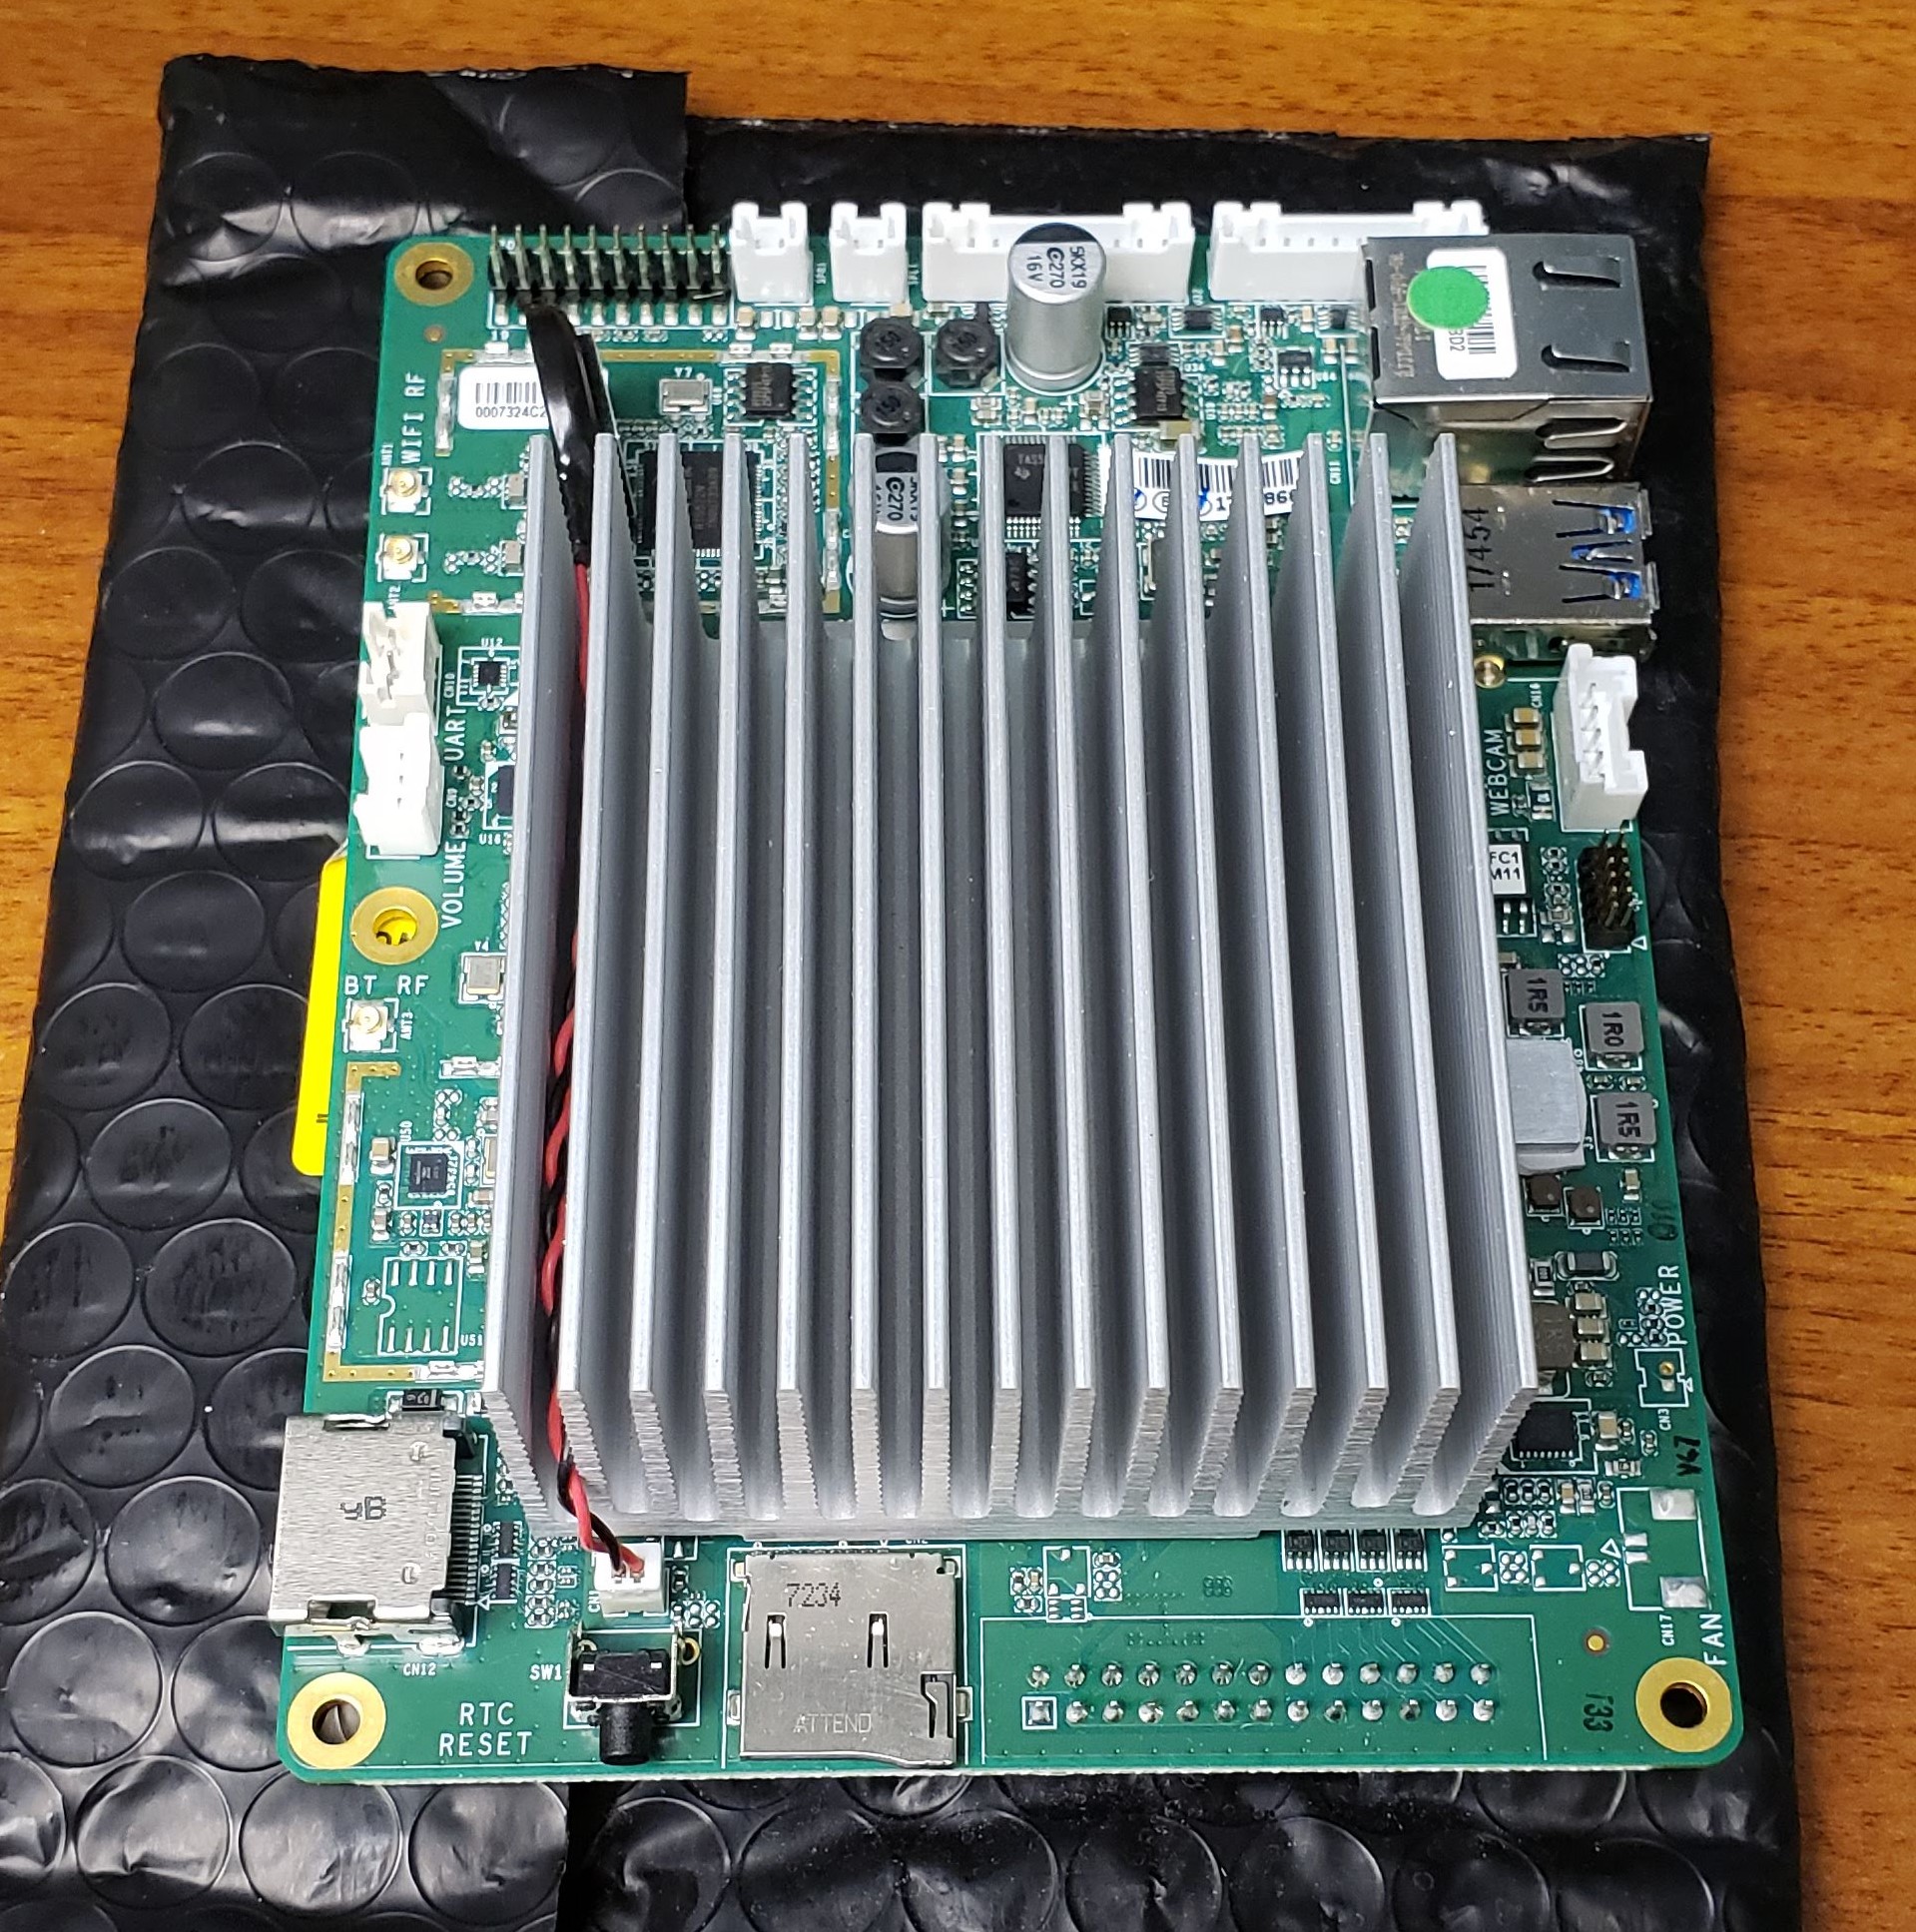
Its a single board computer similar to a raspberry pi that could be found for under $35.00. And to be honest it’s pretty terrible.
What’s bad about this board?
The board doesn’t sit level on a surface because it has the gpio on the bottom. 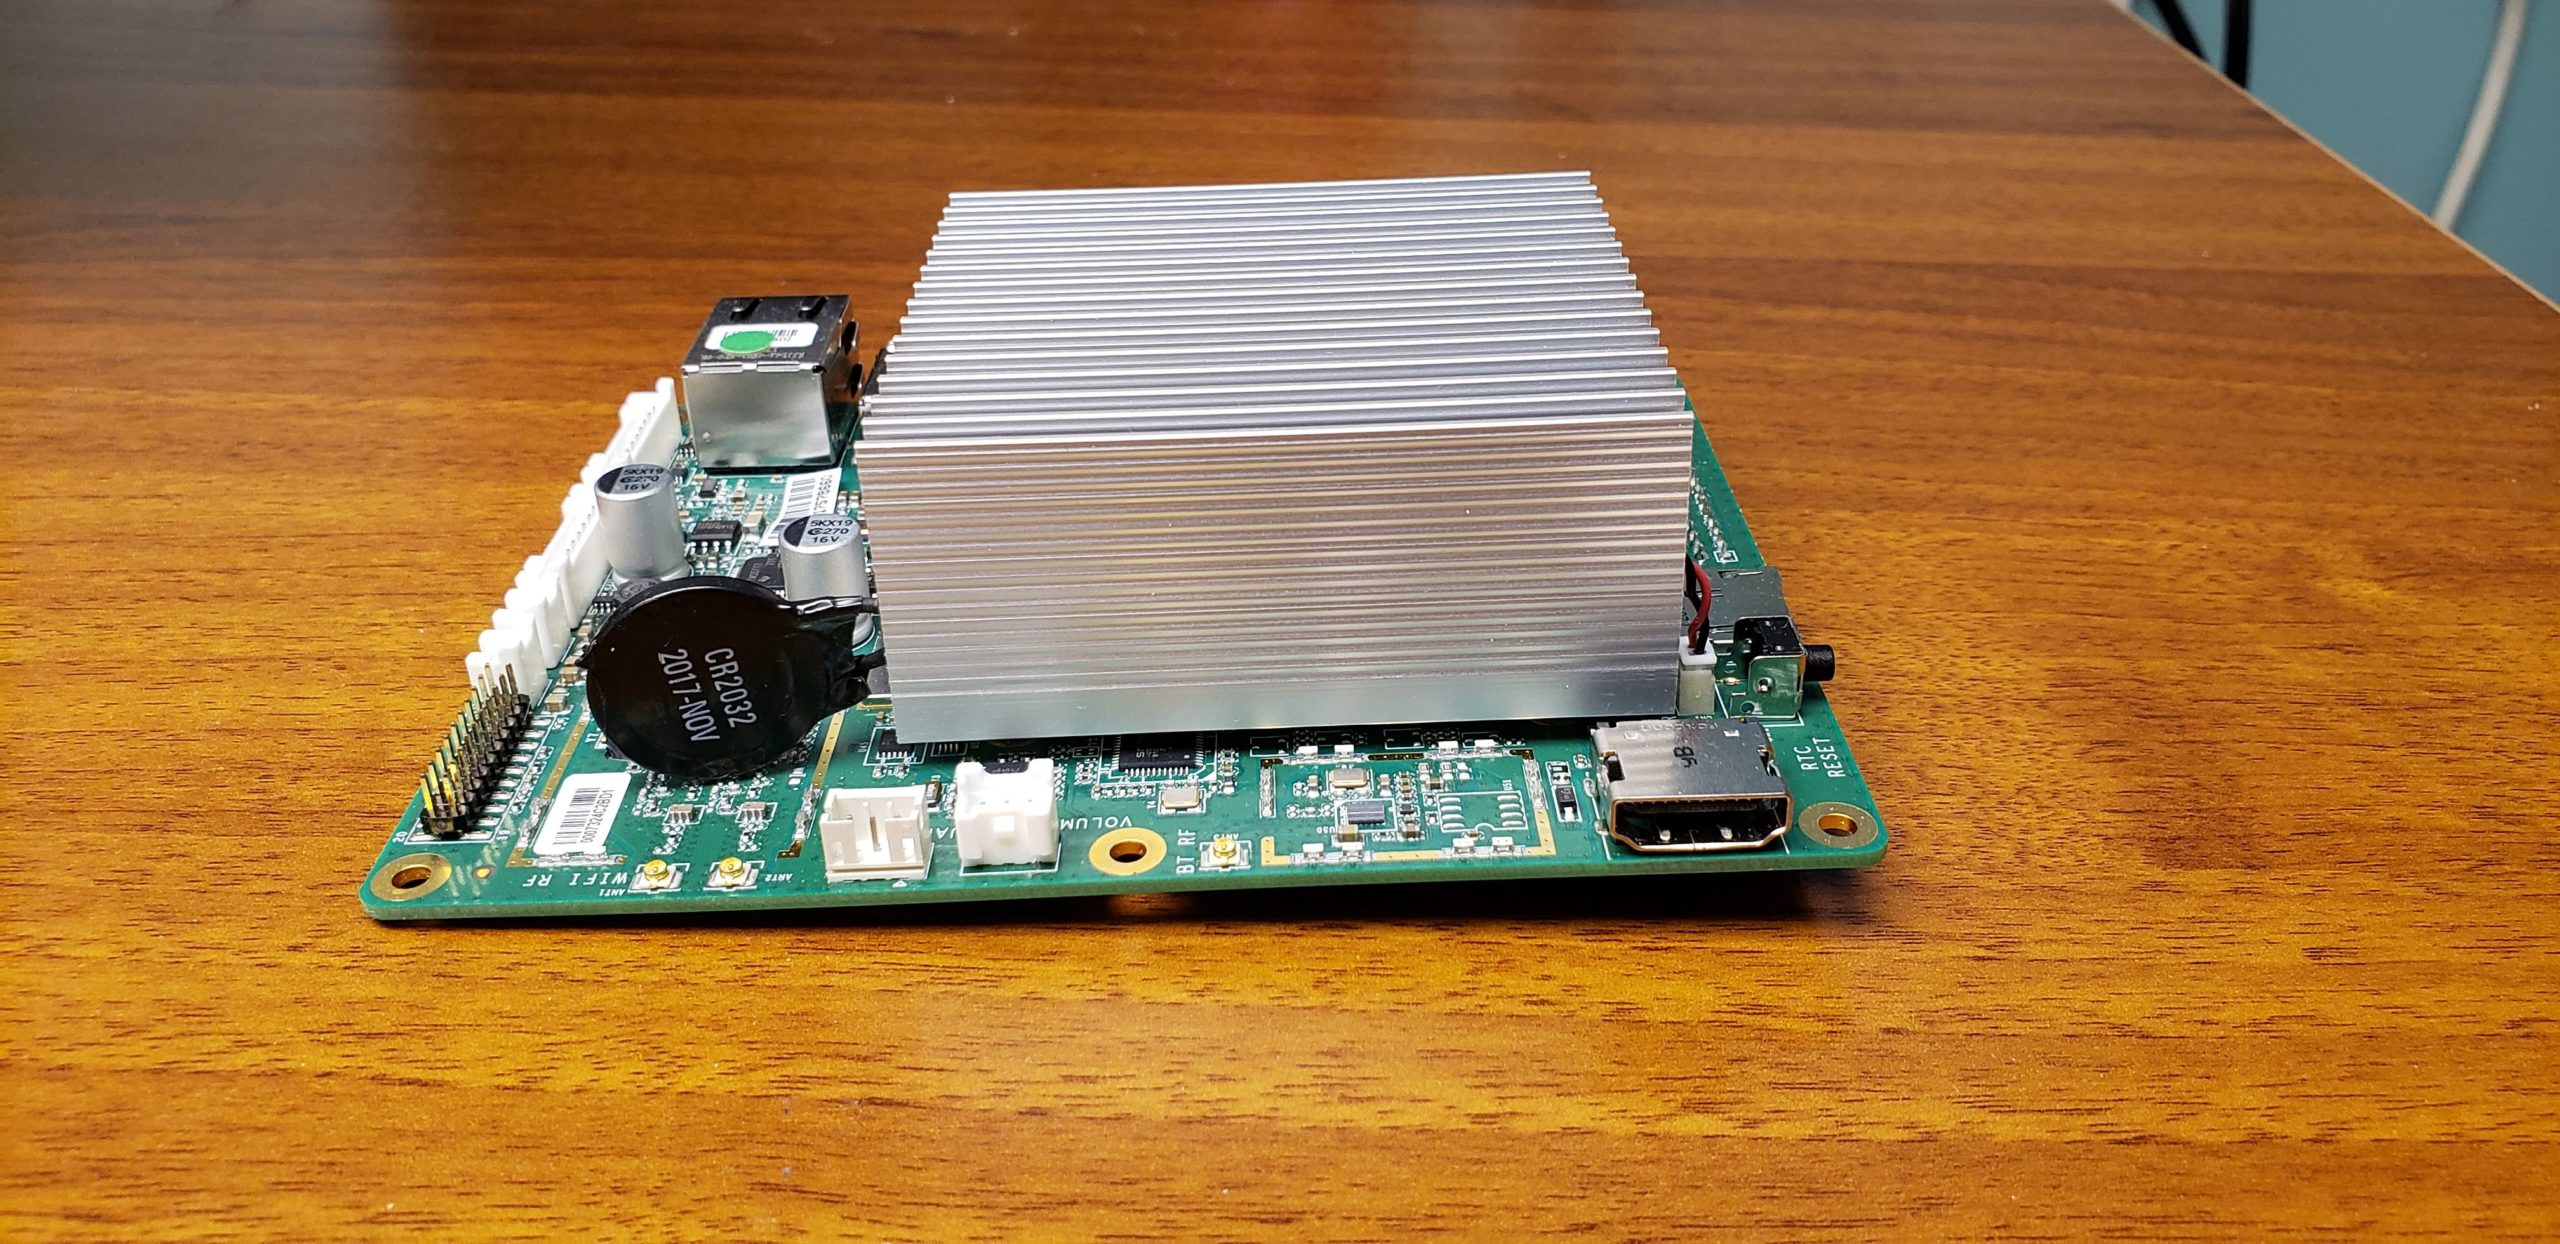
It has a buggy bios and can be difficult to set up initially.
It is pretty limited by 2gb of ram.
Unless you buy another board to power it, you have to wire power through the gpio pins.
So why am I talking about it?
Well what distinguishes this board is it can do hardware video encoding and decoding via Intel’s quick sync feature. This chart shows what formats the chip can do in hardware (the column labeled Cherry Tail).
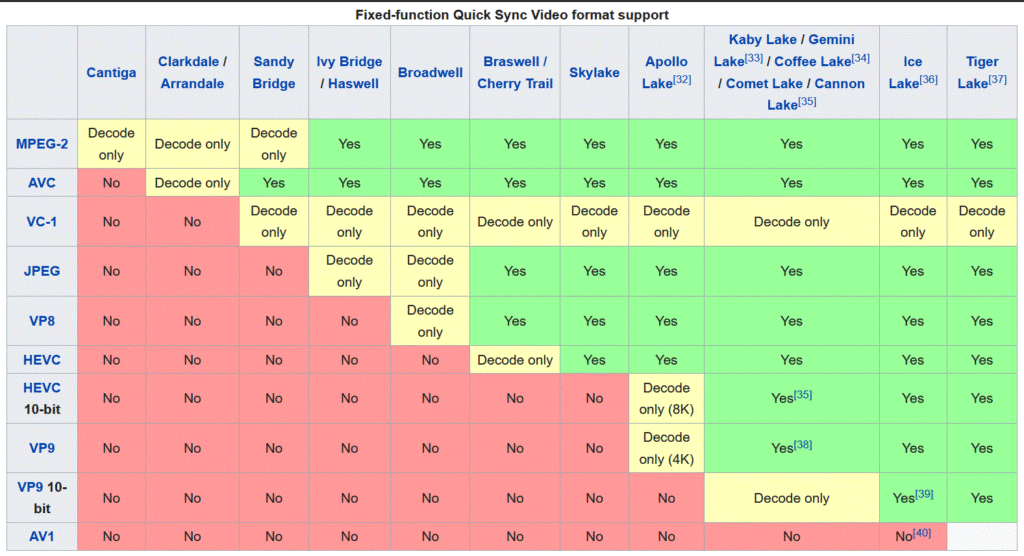
This allows the board to punch way above its price point.
Personally I’ve been running a plex server on this board since February 2020. I have not found its limit in a practical test. I have 3 TVs in the house with Rokus attached to them, and some people in my family who will stream content remotely. Generally I’ll peak at 3 or 4 simultaneous streams at the same time, and this board handles it with no issues. I’ve even pushed it to 7 streams with no noticeable issues. i honestly think my internet connection (currently 20 megabit upload) is the bottleneck I’ll hit first.
My parts list
Atomic Pi
Baby Breakout Board
Power supply
Case (optional)
Storage Media (more on this later).
USB Flash Drive (see below)
Plex Pass (not required, but recommended)
Storage
Personally I have a raspberry pi running Open Media Vault with a 6TB Western Digital hard drive attached. All my media is on that server and I only have a small thumb drive attached to the plex server to hold configuration files. If you want to go that route, I plan to write an article on my NAS (network attached storage) in the future. If you don’t want to do this, you can attach a usb 3 hard drive directly to the atomic pi and put all your media there. I’ll go over both in future articles.
How much storage do I need?
That will obviously vary person to person, but I’ll give you my rough setup. I have around 300 movies that are 1080p, and about 50 tv series and tens of thousands of songs. All that media is less than 2 terabytes. My 6tb drive will suite me for the foreseeable future. I also have plenty of hard drives in other computers where I have backups of all my media in case that drive fails (so I don’t worry about redundancy).
Plex Pass
You can run a plex server without Plex Pass. But to get the most out of this little board you should use Hardware transcoding (what that chart above refers to) which is a feature only available with the paid plan. At $5 / month I think it’s worth it.
Powering the Atomic Pi
The easiest way to power the Atomic pi is to buy the power supply and breakout board in the parts list above.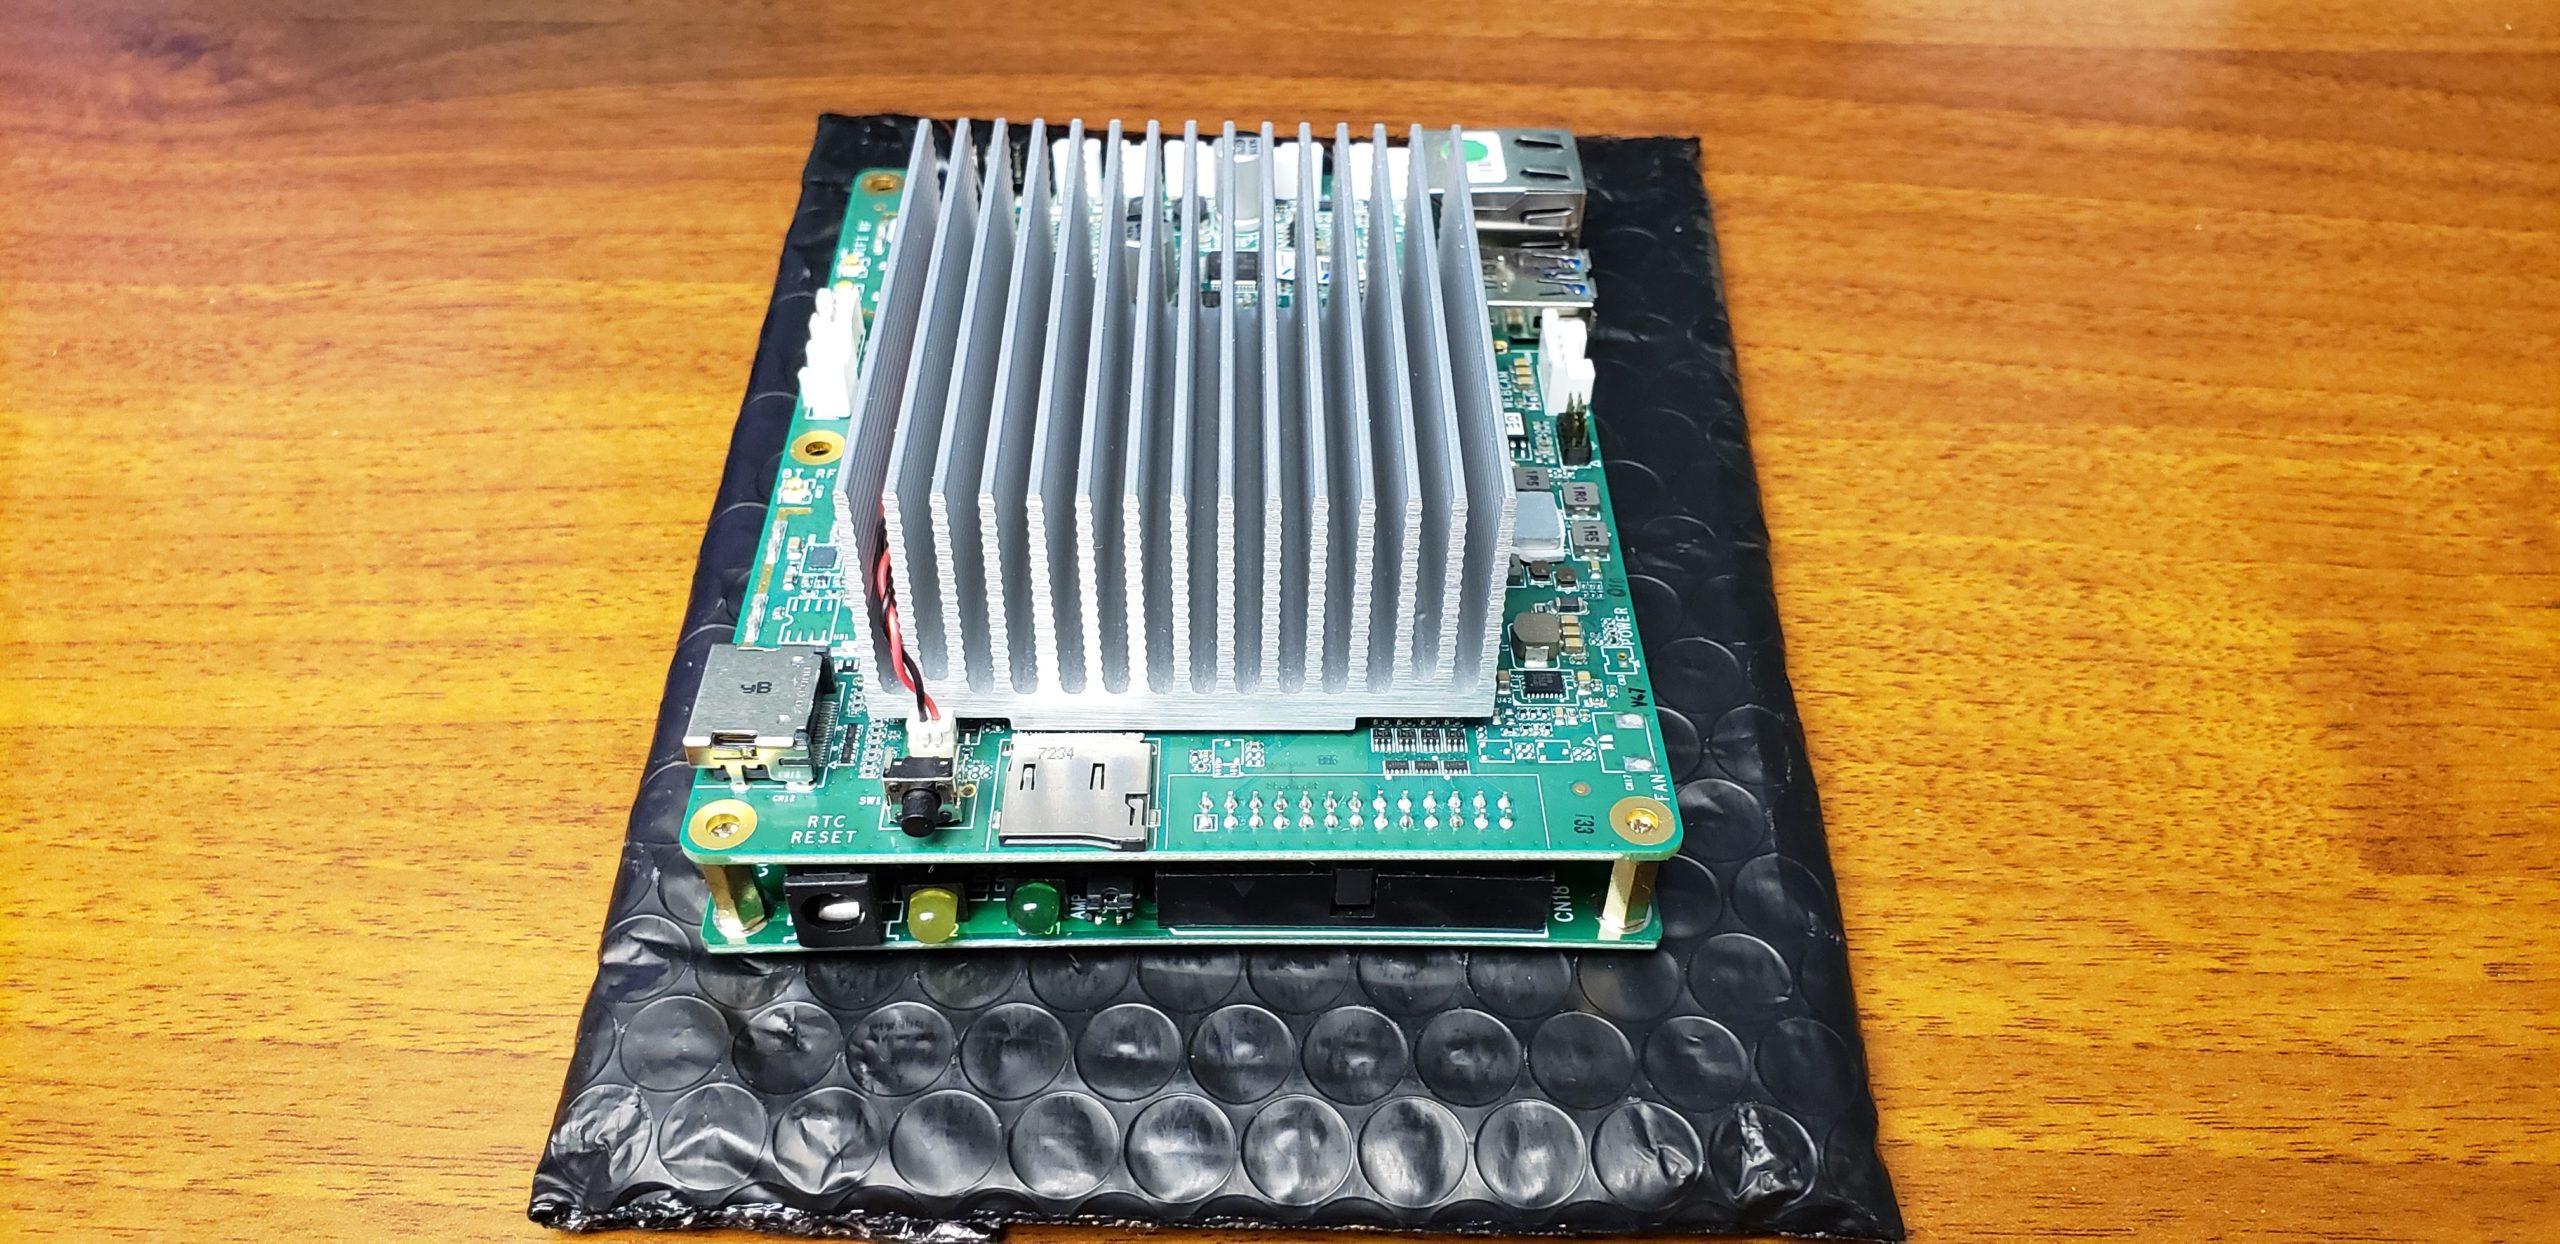
However you can power it with any 5volt 3 amp source to the gpio. You’ll need to run 2 hot wires and 2 ground. Hot should go to pins 3 and 5 and ground to pins 4 and 6.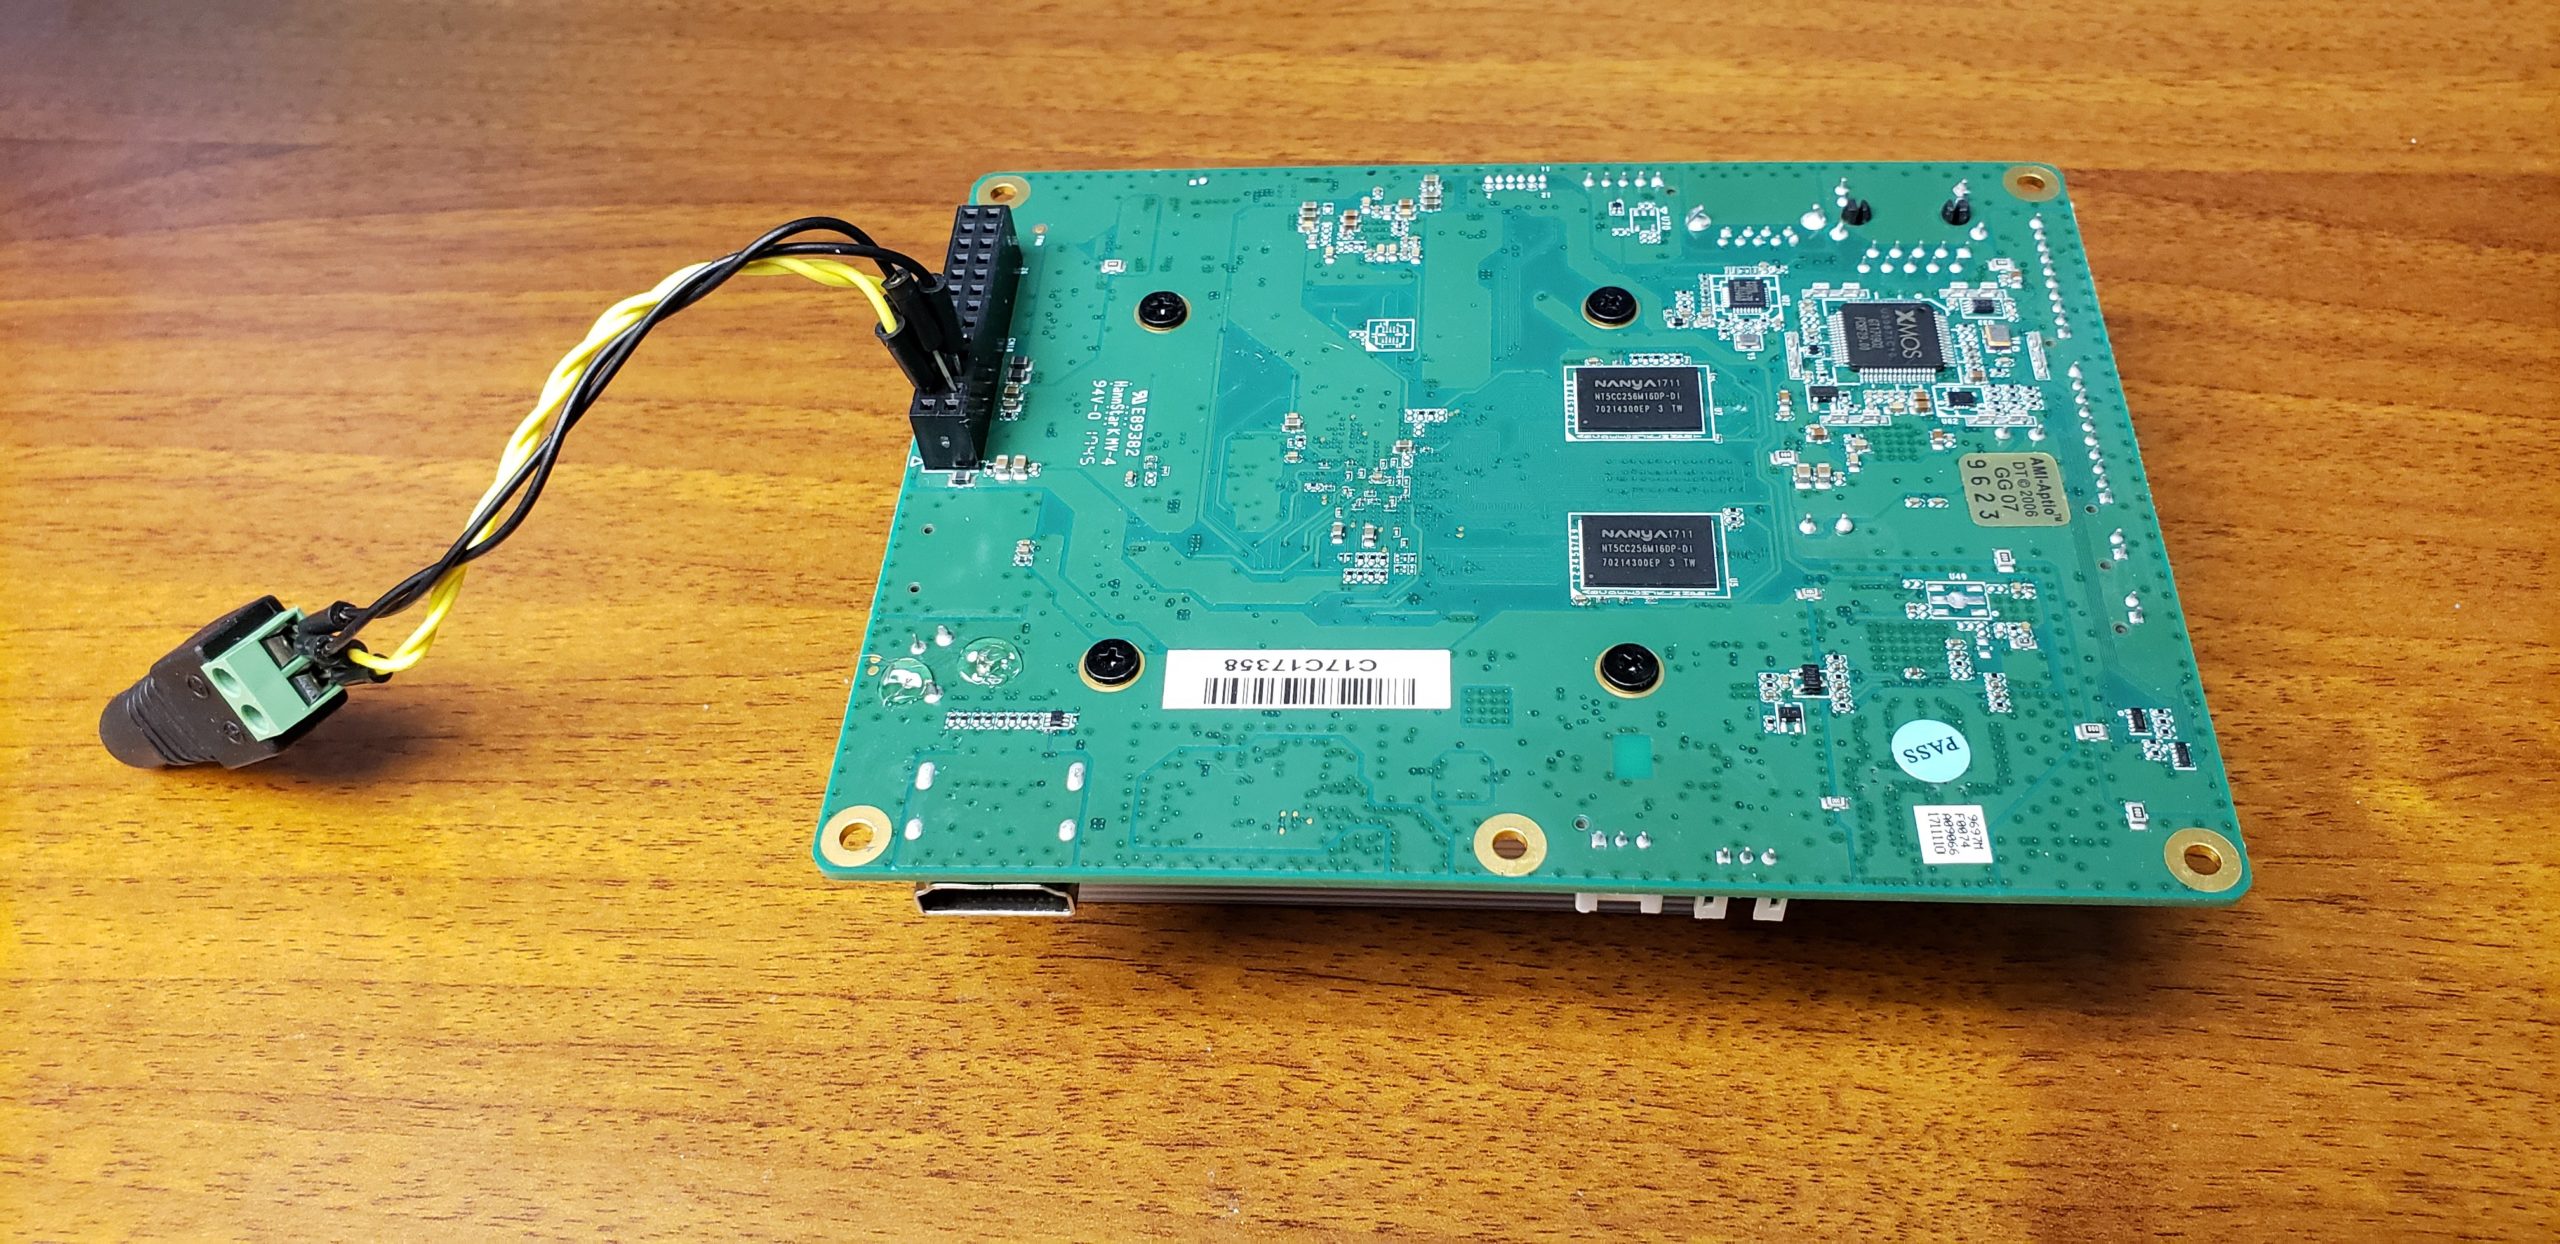
One more note. That button on the board is not a power or reset switch. It’s a CMOS reset switch. holding that will reset the BIOS to factory defaults, so don’t push it thinking that it will just reboot the board.
Network
The atomic pi has a wireless chip on it, however since it’s going to be a server I highly suggest using wired networking. If you still want or need to use wifi, here’s a spec sheet on it.
First Boot
You’ll need a HDMI cable, monitor and a keyboard connected for your first boot. plug those things in first then plug the power into the board.
When you see the following screen press the delete key a few times so that it will go into the bios.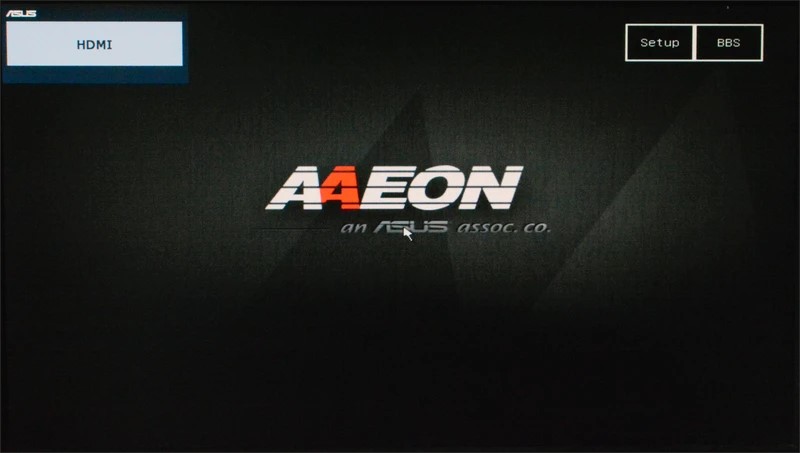
When you’re in the bios you can play around with plenty of settings, but I had to set the following to get it to boot. Go to the Boot menu and change the OS Image Id to Android and change the Boot Options #1 to Android-IA then save changes and reboot. It should bring up a GUI with a login screen. On that login screen it will show the default password on that screen. Write down that password and shut down the machine.
Second Boot
For your second boot you will only need the network cable plugged in, the power supply and the usb storage device (flash drive or hdd). This is when you can put the board in its case if you got one, and put it where it will live long term. After it is plugged in give it time to boot and then you can ssh in to it from another machine. The login is atomicpi and the password is what was displayed on the login screen.
Mount the usb drive
1. You’ll need to create a folder as a mount point traditionally it’s in a mnt foldersudo mkdir /mnt/usbdrive
2. get the partition name of the usb drivesudo lsblk -o NAME,FSTYPE,SIZE,MOUNTPOINT,LABEL
3. mount the usb drive to the mnt foldersudo mount /dev/sda1 /mnt/usbdrive
4. then you can navigate to the drive withcd /mnt/usbdrive
Mount a network drive
1. You need to install cifs-utilssudo apt-get install cifs-utils
2. Create a mount point mkdir /mnt/networkdrive
3. Create a user on the target machine
4. Mount the network drivesudo mount -t cifs -o username=[networkUser] //10.0.1.5/files/ /mnt/networkdrive/
This would mount a drive on the host machine 10.0.1.5 to /mnt/networkdrive.
After running this command it will ask you for the [networkUser] password.
You can set the system up so that it auto mounts these drives on boot, but since I’ve only rebooted the machine once or twice in months I haven’t bothered yet.
Other Configurations
Install Nano (a text editor)sudo apt install nano
Change Hostname sudo nano /etc/hostname
I called my plex server AtomicPlexsudo nano /etc/hosts
Make sure Docker is installeddocker -v
Create a Plex container
Personally I use docker-compose to manage all my containers. Here’s an example of my docker-compose.yml file.
version: '3'
services:
  plex:
    image: linuxserver/plex:latest
    container_name: plex
    network_mode: host
    environment:
      - PUID=1000
      - PGID=1000
      - VERSION=docker
    devices:
       - /dev/dri:/dev/dri
    volumes:
      - /mnt/usbdrive/appdata/plex:/config
      - /mnt/networkdrive/media/tv:/tv
      - /mnt/networkdrive/media/movies:/movies
      - /mnt/networkdrive/media/music:/music
    restart: unless-stopped
This creates a docker container that connects to a network drive for its media, and connects to a flash drive for its configuration. (plex does not support configuration being stored on a network drive).
Running the Container
In order to run the above container navigate to the directory with docker-compose.yml file. Then run the following commandsudo docker-compose up -d plex
Finally
You can navigate to http://atomicplex:32400
Where [atomicplex] is the hostname or ip address of your atomic pi server.